After owning our 2002 Dolphin motor home for over 6 years and living in it fulltime for almost 4 years, we were tired of the layout of the front living area. We like the entire layout of the motor home, but the living area could be improved for our style and comfort. Many people change RV's when they get tired of one, but that's not financially prudent. We plan to keep this motor home for many more years, so we'll just keep improving it. Much like you would a renovate or change a regular sticks and bricks house. In addition to not liking some of the layout, some of the upholstery was wearing out.
When we started planning this renovation, our goal was to repair or replace the worn upholstery, move the television to a more pleasnat viewing angle, create a more comfortable television viewing experience, and have a better computer work area. Like many class A motor homes, our TV is mounted high above the front windshield. Sitting on the couch, you need to twist your neck sideways to view the TV. Our computer station consisted of a recliner with a fold-up table. This heavily used recliner had HUGE wear holes in the upholstery, as did the passenger seat. Connie also never liked having carpet in the living area, as it was always dirty and worn. She preferred a wood floor with an area rug.
We started researching and getting ideas for our living room renovation a couple years ago. After viewing what others had done, we had a general idea of what our renovation would consist of:
- Replace the living room carpeting from the kitchen lineoleum to the front of the motor home with laminate wood flooring.
- Replace the RV style sofa/sleeper with a residential style dual reclining love seat.
- Replace the recliner and fold-out computer table with a flat screen LCD TV and TV table. The table would also double for storage and/or a wine rack.
- Remove the old overhead TV. Turn that area into storage with double doors.
- Re-upholster or replace the drivers captain chair and the passenger captains chair.
- Have a specially designed computer desk custom made to sit next to the love seat.
|
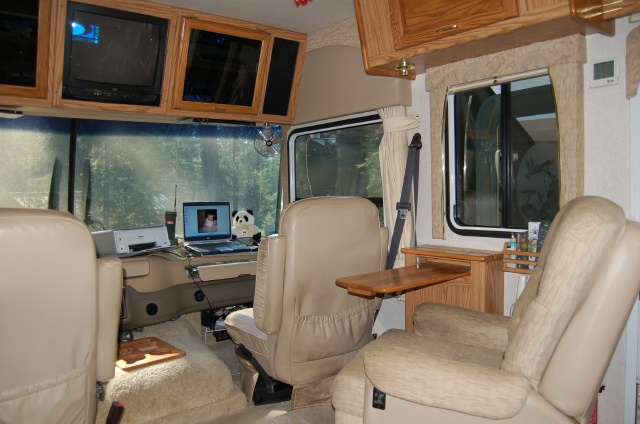 |
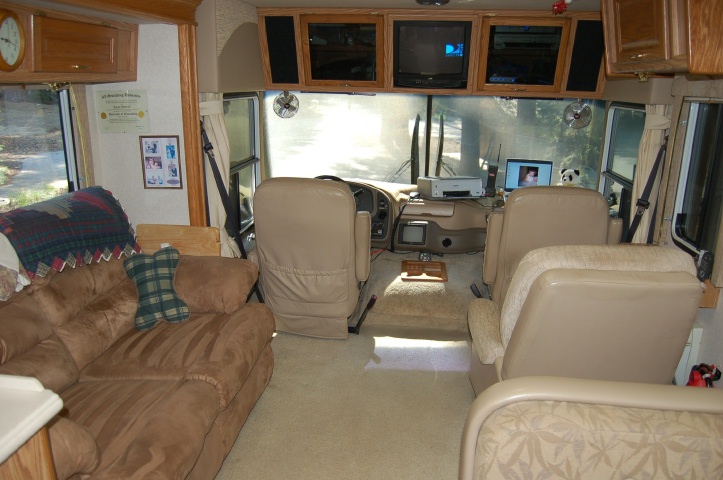
| Original living room with new love seat. | Original recliner and computer table. |
Sofa Replacement
In January 2008, we had the opportunity to sell the old RV sofa/sleeper. It was slightly worn, but otherwise in fair condition. This was the beginning of the renovation. After selling the old sofa, we soon replaced it with an "Ashley Furniture" dual reclining love seat ($600). This was also the first challenge we had. Our sofa sits in the living room/kitchen slide out. Since the kitchen is also in the slide out, it's only 22" deep. The base of the residential love seat requires at least 30". We contemplated various methods of extending the slide out using 3/4" plywood, but ended up using bar stock metal. This didn't work perfectly, as the metal was bending under the weight of the front of the love seat. This is the part of the love seat that extends beyond the slide out and has weight on it. The metal started working like a spring, making the love seat bouncy. For now, we are using a 2"x2" board under the front of the love seat to support the front weight. We currently need to remove this board when we move the slide out in. We don't mind this and may keep it this way. We've also considered bolting wheels on the front bottom of the love seat to support the weight and roll when the slide out is moved.
The next problem we encountered with this love seat is the placement of the reclining controls. We didn't think about it, but the controls on this brand are on the OUTSIDE of the chair. Other brands (Lazy Boy) have the recliner controls on the INSIDE of the seat. With controls on the outside, this forced us to allow a couple inches on each side of the love seat to access the controls. While this isn't a large problem, it did make us re-think our plans for an end table that was also going to be a computer table. The size of the love seat and the extra space on each side doesn't allow much room for the planned end table.
We like the new reclining love seat. It's very comfortable; we've fallen asleep in it many times. It'll be nice and comfortable to recline next to each other to enjoy our movie/TV expereince. However, with the minor problems we had, we've learned that we'll need to take this renovation project one step at a time. Plans will constantly change in each step. We now need to wait and see where/how we'll handle the computer station. We're now thinking having the new (smaller) end table custom bulit to also extend further out from the slide. The driver's captain chair can be turned around for access to this table. We won't know until the new captains chair is installed.
Carpet Replacement with Laminate Wood Flooring
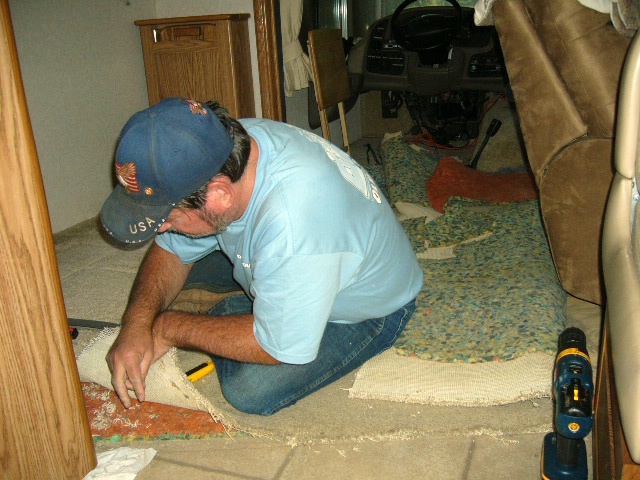
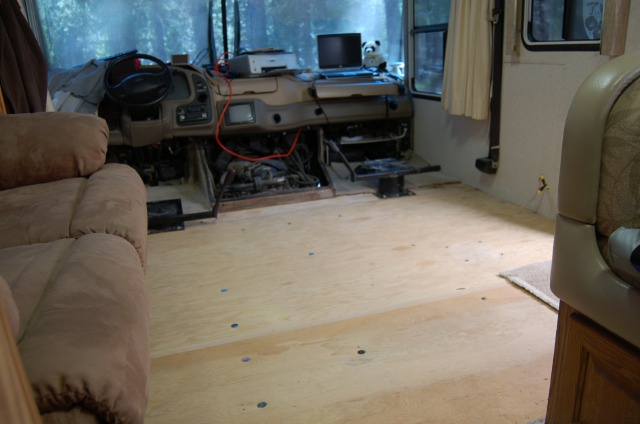
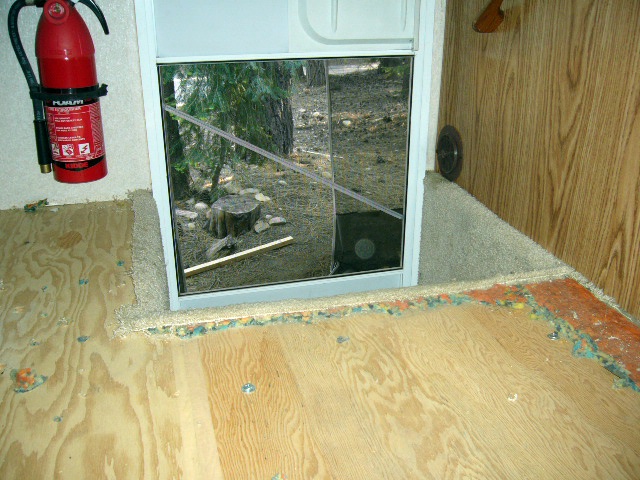
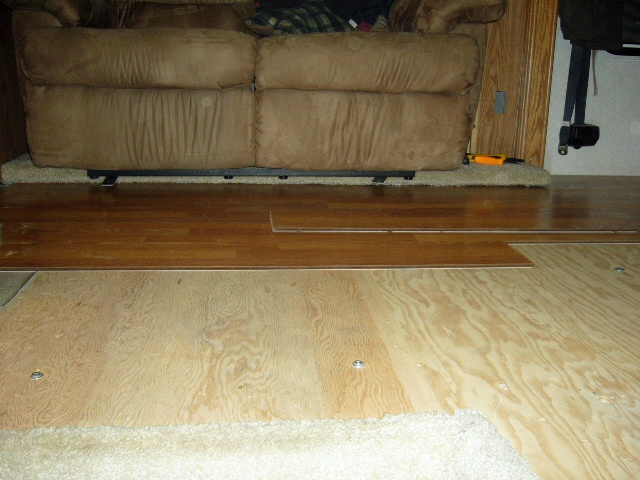
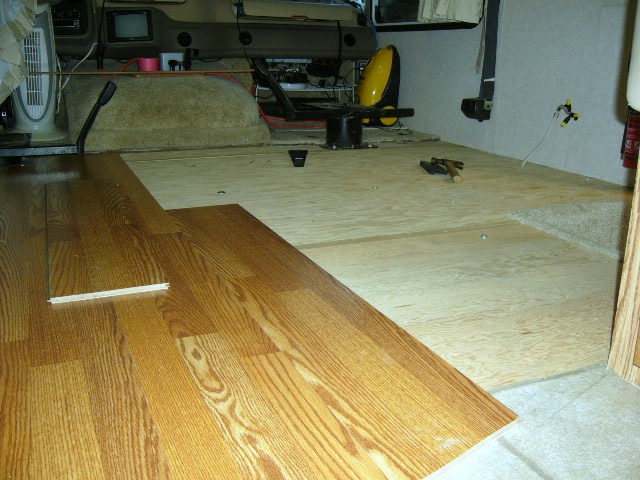
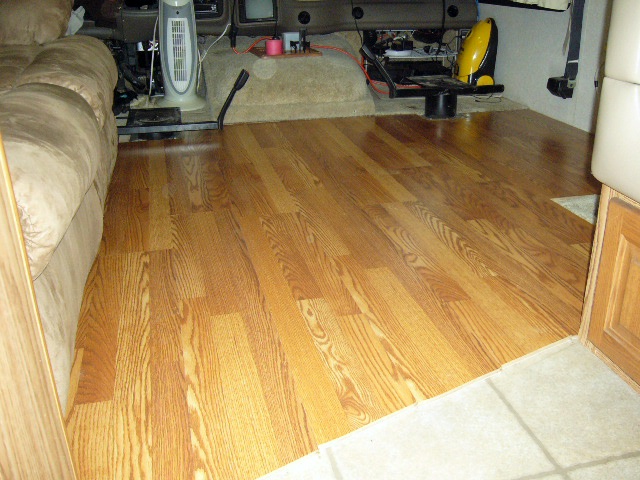
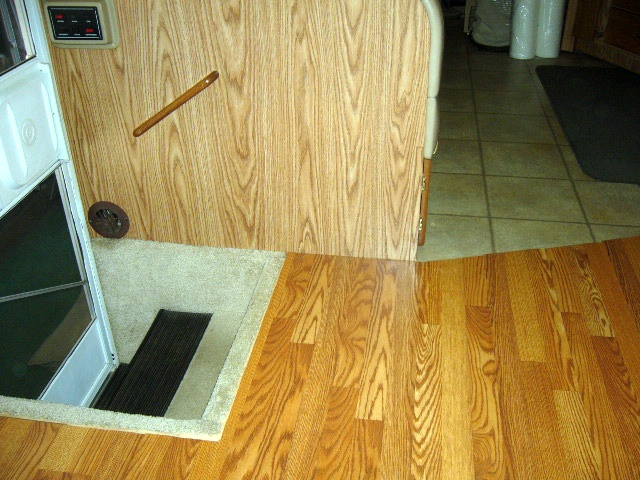
July 2008: While working in the forest for the summer of 2008, we took that sitting time to finish the renovation. This started with removing the factory installed carpeting. Some people also replace the vinyl in the kitchen with wood flooring. We decided to keep the vinyl and just replace the front section carpeting. Once we started removing the carpeting, we slightly changed plans again. Originally, we talked about replacing the carpeting around the stairway but decided to leave the carpeting. In addition, when removing the carpeting we found the front section under the drivers and passengers feet didn't have a wood sub-floor. There was thick fire retardent material with a metal floor. Since this area is mostly hidden by the captain chairs, we decided to leave the carpeting alone in this front driving area. Of course, these changes made the carpet replacement project MUCH easier.
Tearing out the old carpet and padding went fairly quickly. We removed the drivers chair and the passengers chair to give us more room. We also removed the recliner and wall mounted fold out table. Since the recliner wasn't going to be reinstalled, we also removed the pedestal for the recliner. The hardest part in removing the old carpeting and padding was pulling out the dozens of staples used.
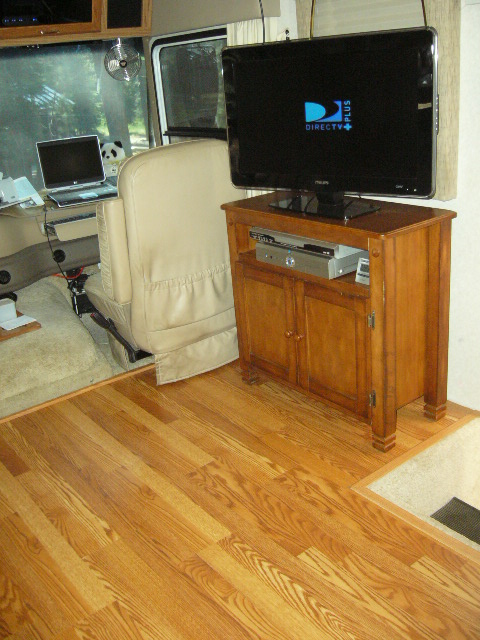
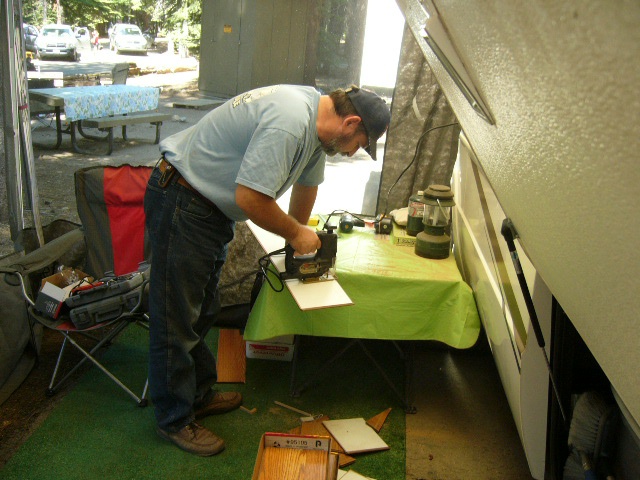
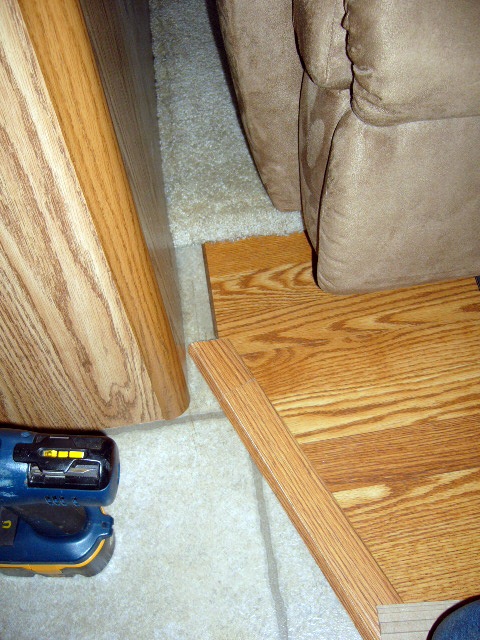
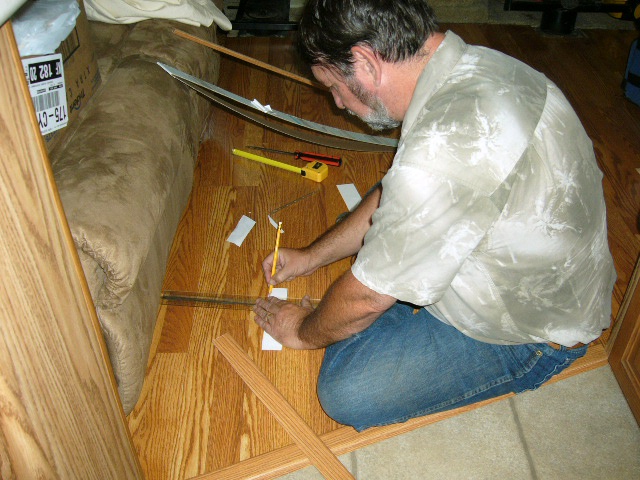
Once the floor was clear, installing the laminate wood flooring went fairly smooth. I used a jigsaw with a fine blade to trim the flooring as needed. The type of laminate flooring we used already had underlayment a padding attached, so it was a simple job of connecting the flooring panels and laying them in place. The flooring isn't glued or nailed to the floor. It just lays there under it's own weight. With a little planning and making paper templates, the edging and trim also went into place fairly easy. The flooring was installed in one day for a cost of about $180.
New Television and Stand
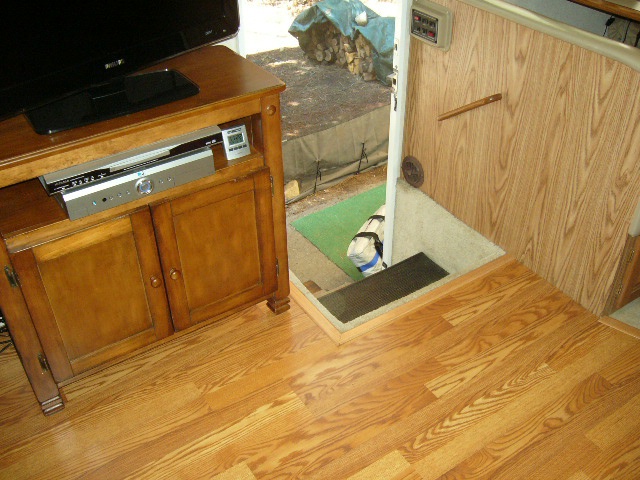
July 2008: One of the main reasons for performing this renovation was to move the television to a more comfortable viewing location. Up above the front windsheild was a good location to conserve space, but a terrible location for viewing. We like our movies and wanted a more pleasurable viewing experience. The plan was always to replace the recliner with a table and flat screen TV. These would sit directly oposite from the reclining love seat. We looked in quite a few locations for the TV stand/table. Of course, it had to fit into the allocated space. We were having problems finding what we wanted that would fit. We started thinking we would have a custom table made. While visiting a PetCo pet store, we saw the aquarium tables. They looked the right size and would be strong enough to hold the weight of the TV. We measured, and found a rustic oak table aquarium stand that would work. Since Connie wasn't convinced the color/style would fit in with the decor, we were insured we could return it. This $200 table looks great and is built strong!
We also measured that we could fit a 32" LCD television in this space. The addition of a Philips 32"LCD flat screen television finished off the renovated living room. The TV will be secured to the table and the table secured to the floor. Hopefully, this will protect the TV while driving on rough roads. The table we purchased had a shelf for the DVR and DVD player. We plan to place a wine rack inside of the table.
|
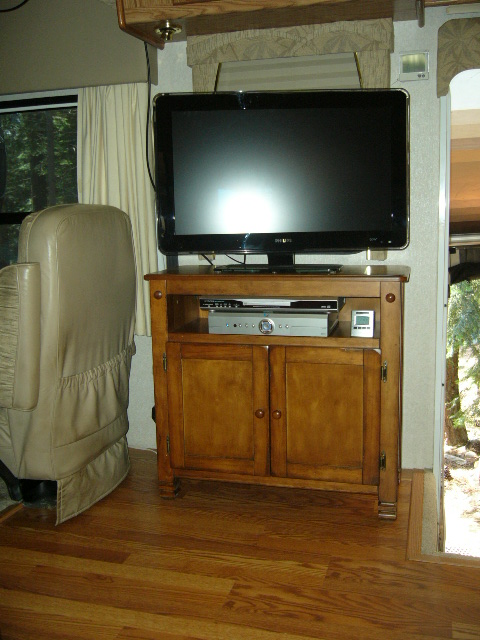 |
| New flooring, TV and stand (old chair) | New TV and stand. |
July 2008: Next step - order and install new captain chairs. (Coming soon)


Follow